So, Christmas has come and gone and Build a Bear Workshop was a part of ours ;) However, anyone who knows me knows I am not paying what they want for clothing for these guys. And my girlie wanted some of those clothes soooo badly.
This pair of bear pants were only TWO....2....1, 2 two seams! I used recycled jeans of my daughter's. They were made a smidge bigger than this bear...but only by a hair ;) I made them because this is not the creature they are intended for. My daughter picked out the bulldog (and promptly named her Uga, as any good Georgia peach would). And Uga is a smidge more pudgy than the average Build a Bear. So, these directions might be give-or-take about 1/4 inch here or there. Not too hard to manage when you are sewing too big and NOT too small ;)
Here is my template
Here we go with the tutorial....in as many pictures as possible!!
Lay the pattern piece (which is meant to be placed ON a FOLD) on the fold of the outer leg seam. I slit my inseam so that it would lie flat.
The hem of my jeans are exactly on the bottom edge of my pattern piece.
And outer seam is lying flush with the edge of pattern piece. Pin then cut.
This is what it should look like :)
Repeat. These jeans were purchased with embellishments already applied, so if you'd like something nifty on yours, apply it now!
With the right sides together, fold each piece in half and pin.....
then stitch.
Turn ONE of them right side out.
And slide that one inside the other to match up crotch seam
Pin.
Great time to remove this extra plate if you have a removeable one!
Stitch the crotch..and it will look like
this!
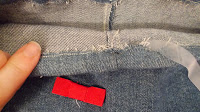
Turn under about a 1/2" waist band. PRESS.
It will look like this.
Stitch all the way around it, except for about 1 1/2 ".
If you have a bodkin with which to thread your elastic through, use it. Otherwise a safety pin will work just fine. This piece of elastic is not the best one for this project..it just turned out to be all I had, after destroying my notions box. Sooo....anyhow.....it is about 16"-18" long...
When it comes through to the other side, pin it then size it on your bear.
While I was sizing, I marked (with disappearing ink) where the tail slit will go.
Once you've sized the elastic on your bear and pinned it at the size it should be...
stitch it together
and then complete the waistband stitch, which encloses the elastic!
Ripping out the tail slit..
Thought it needed a bit more than I originally marked
Stitched around it in buttonhole shape..NOT with the buttonhole stitch. Although you could, if you wanted to, but I don't expect these to last forever so I'm not putting a ton of effort into tiny details!!
Here's my guy!
 | |
| I can't figure out how to rotate this picture, so I won't worry about it now! |


